1.1.4.1.1. Create new user

In the following is described how to create a new user:

  1. Click on the Create User button.

    -> The same-named page appears.

  2. Fill out the form.

    All fields marked with * are mandatory fields and have to be filled out.

    Especially regard the Activated and Enabled checkboxes.

    • Enabled checkbox:

      • Activated:

        The account is available at once.

      • Deactivated:

        A deactivated user is not able to register at any portal.

        First he has to enable his account with an activation mail or an activation code.

        After that his account is activated.

    • Enabled checkbox:

      • Activated:

        The account is enabled.

      • Deactivated:

        The account is disabled.

        A disabled user can neither register at any portal nor enable his account.

  3. You have the following two options:

    • Create:

      If you click on Create, then a user without role is created. Meaning the user cannot access any portal.
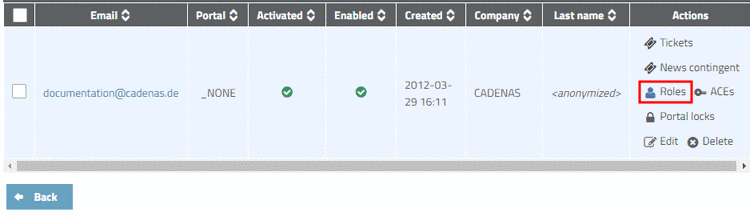
      [Note]Note

      The creation of a role is necessary, because only then the user gets certain authorizations.

      If you use Create, then the role (or several) has to be created later.

      Via Manage users -> Create user roles ...

      ... you can reach the Manage user roles page anytime. See Section 1.1.4.8.1, “Assign new role”.

      For an individual user you can also click on the Roles action in the dialog Manage users, in the user table, in the desired row (see Section 1.1.4.8.1.2, “Assign new roles to a specific user”).

      [Note]Note

      Automatic assignment of roles

      The portal operator may decide, whether after the registration on the portal an automatic role assignment shall happen. In this case the user has to accept the portal operator's license terms at the first-time registration on the portal. Then he automatically gets the respective user role for this portal.

      Example:

      In order to be able to download parts from a PARTcommunity portal, the user needs the following role: Catalogs -> RoleType –> user, Portal –> <Portalname>

      In contrary to user roles the administrative roles are not assigned automatically.

      After clicking on Create a new user is created and a respective message is displayed.
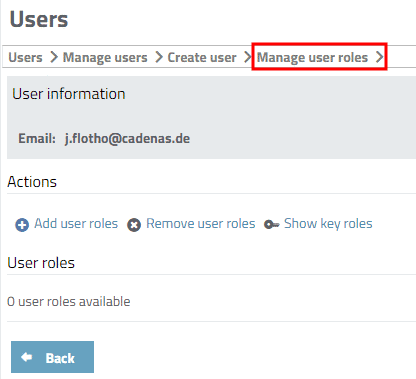
      Hereby the action is finished.

    • Next (Add roles) >>:

      If you click on Next (Add roles) >> the new user is also created, but in addition after the user creation the Manage user roles page opens. See following list items:

  4. Click on Next (Add roles) >>.

    -> You reach the Manage user roles page.

    [Note]Note

    The new user was created. In the User information section user name and email address are shown.

  5. Click on the Add user roles action.

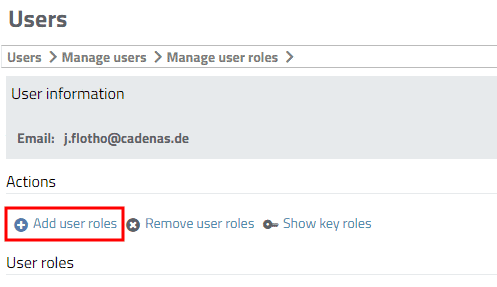
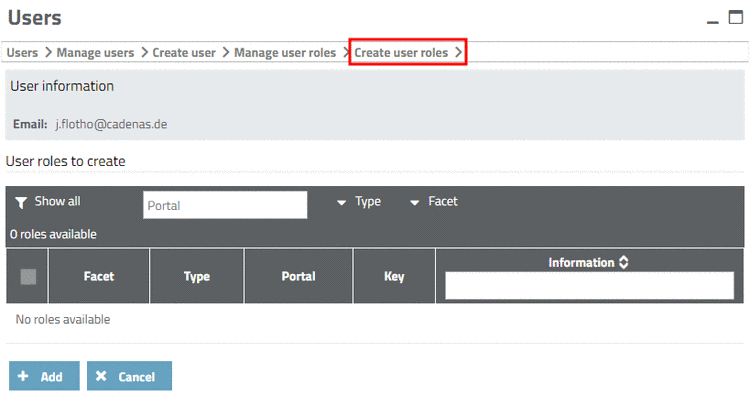
    -> The Create user roles page opens.

    When clicking on Show all, all roles are displayed. However, you may also set specific filters.

    Following filters are available:

    • Portal:

    • Type:

      • admin: Portal administration

      • external: Portal operator

      • internal: CADENAS personnel

      • user: Portal user

    • Facet: In the course of this documentation only "Catalogs" matters.

  6. Select the checkbox at the desired roles and finally confirm with Add.

    in the dialog "Create user roles", all roles meeting the filter selection are displayed.

    in the dialog "Create user roles", all roles meeting the filter selection are displayed.

    -> If the action was successful, the roles added for the respective user are shown.