 |
|
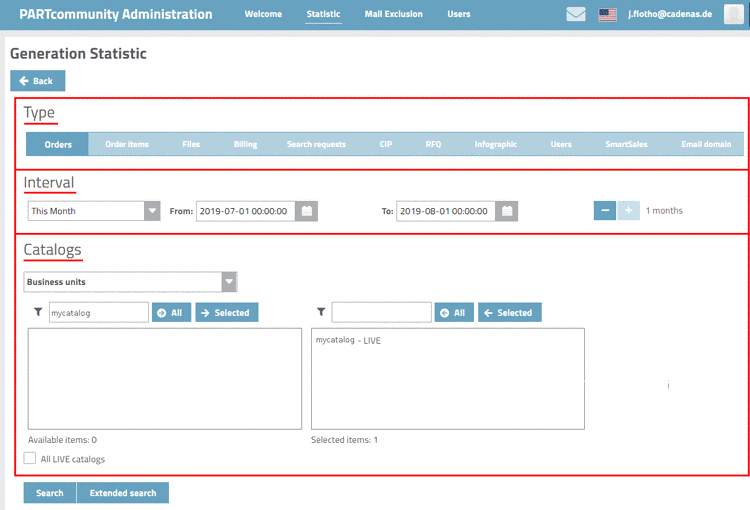
On the main page (first page after opening Statistic), you can find the button . After clicking on this button, you reach the dialogs described here. With you can return to the main page anytime.
Determine Type, Interval and Catalogs of statistic to be created. These basic settings are the same for all types of statistic.
Under Type, select one of the options from Orders, Order items, Files, Billing, Search requests, CIP, RFQ, Infographic, Users, SmartSales or Email domain.
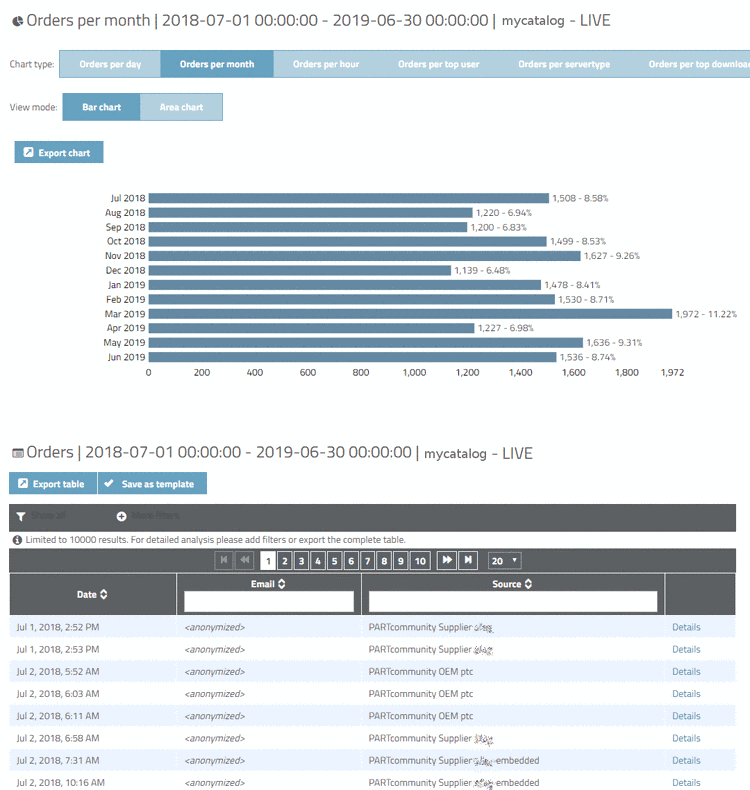
Using the Orders option all orders within the set interval are displayed.
In the table, from each table line, via link Details, you can optionally reach the view Order details.
More information can be found under Section 1.3.3.2, “Orders | Order items | Files -- Analyze orders”.
Using the Order items option, each single CAD format is listed for each downloaded part, within the set interval (regardless of whether it's a part or assembly).
For 2D CAD formats each view is listed separately.
More information can be found under Section 1.3.3.2, “Orders | Order items | Files -- Analyze orders”.
Using the Files option all Order items + Order item components in set interval are displayed.
If it's about assemblies: Assembly file, part files and in the case of 2D CADs view files in addition.
If it's about parts: Part file and in the case of 2D CADs derivation files in addition.
More information can be found under Section 1.3.3.2, “Orders | Order items | Files -- Analyze orders”.
Via Billing you receive a data view which corresponds to the billing. For details on this please see Section 1.3.3.3, “Check billings”.
Via statistic type Search requests you have various possibilities to analyze search requests on your portal. For details on this please see Section 1.3.3.4, “Search requests -- Analysis”.
Via CIP option you can display the PARTadmin online downloads of your catalog with information on time, version and logged in user performing the download. For details on this please see Section 1.3.3.5, “CIP -- Analyze catalog downloads”.
Via RFQ option you can display requests for quotation, which have been sent to you concerning a certain component on your portal. For details on this please see Section 1.3.3.6, “RFQ -- Analyze requests for quotation”.
Infographic shows the most important graphics on parts generation, modalities of search requests, CIP downloads and requests for quotations. For details on this please see Section 1.3.3.7, “Infographic”.
Users provides a list of portal users within a specified interval. For details on this please see Section 1.3.3.8, “Users -- Analyze portal users within a specified interval”.
Smart Sales shows downloads grouped according to companies. For details on this see Section 1.3.3.9, “Smartsales”.
Email domain performs a search only with domain name. For details on this see Section 1.3.3.10, “Email domain”.
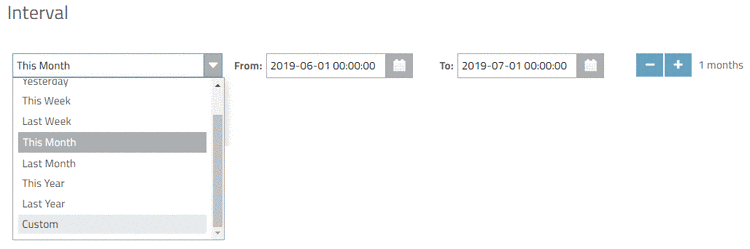
In the Interval area, either determine the interval with the help of list field options (Today, Yesterday, etc.) or via calendar function (From - To). Via minus and plus button, you can easily adjust the interval.
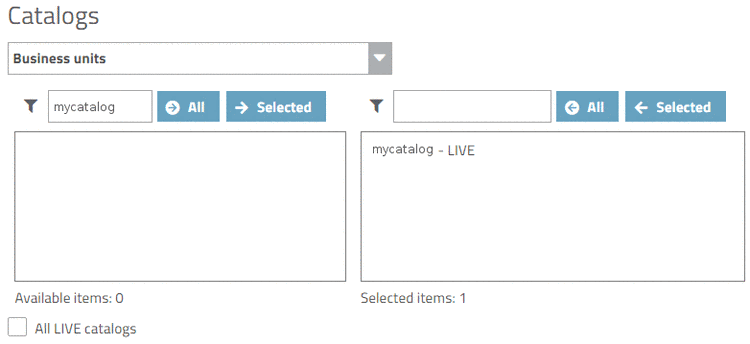
In the Catalogs area, determine the catalogs to be included in the statistic.
The procedure explained in the following applies if there is more than one catalog available: All available catalogs are displayed under Available items on the left. Catalogs determined for the statistic are displayed under Selected items on the right.
Different filter options ease the selection.
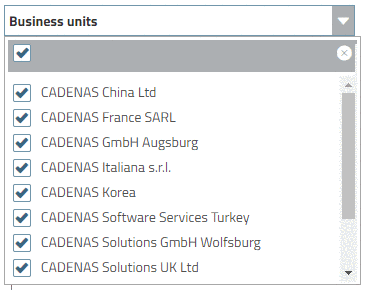
Via list field select one or more business units. The display is adjusted dynamically with each change.
Insert the first letter(s) or the complete catalog name of desired catalog. The display is adjusted dynamically with each change.
All LIVE catalogs: The statistic is created for all LIVE catalogs. All other filter options are hidden.
Once all settings are done start the statistic generation by clicking on or .
![[Note]](images/note.png) | Note |
|---|---|
Before starting the generation please check, if at least one catalog is displayed in the right dialog area. | |
| Note |
|---|---|
Using there will be no search performed in the first step, in order for you to be able to set filters first. See Section 1.3.3.1.1, “Filter options”. On the next
dialog page you can set the same filters afterwards just as well via
| |

![[Tip]](images/tip.png)